Fall DIY Craft Ideas: Seasonal Projects That Actually Look Good
Contents
Fall DIY crafts transform your space without emptying your wallet. I’ve spent years making autumn decorations, and I’m done with those Pinterest fails that look nothing like the photo. Let me show you projects that actually work.
🎨 Steal This Look
- Paint Color: Sherwin-Williams Urbane Bronze SW 7048
- Furniture: reclaimed wood farmhouse dining table with bench seating
- Lighting: oversized woven rattan pendant with Edison bulb
- Materials: raw burlap, dried wheat stalks, copper wire, unfinished pine, beeswax
I learned this the hard way after ruining my grandmother’s wooden bowl with leaking painted gourds—now I only use materials that honor the season’s honest decay.
Why Bother Making Your Own Fall Decorations?
Store-bought fall decor costs a fortune and looks exactly like everyone else’s stuff. When you make your own, you control the colors, the style, and the budget. Plus, there’s something deeply satisfying about drinking cider while hot-gluing leaves to things.
Here’s what you’re getting into:
- Time investment: 30 minutes to 2 hours per project
- Budget: $5-$50 depending on how fancy you get
- Skill level: If you can operate a glue gun without burning yourself, you’re qualified
- Results: Custom pieces that don’t scream “I bought this at Target”
The Essential Fall Craft Supply Kit
Before you start any project, gather these basics. Trust me, nothing kills creative momentum like running to the store for twine.
Your starter supplies:
- Hot glue gun and glue sticks – the MVP of fall crafting
- Mod Podge – basically magic in a bottle
- Acrylic paint set in autumn colors
- Twine and jute rope
- Floral foam for arrangements
- Scissors, paintbrushes, and old newspapers
Natural materials you can forage for free:
- Fallen leaves (choose the prettiest ones)
- Small branches and twigs
- Acorns and pinecones
- Interesting seed pods
I collect these on dog walks and store them in a cardboard box. Your family might think you’re weird, but wait until they see the finished projects.
✎ Steal This Look
- Paint Color: Farrow & Ball Hague Blue 30
- Furniture: vintage apothecary cabinet with small drawers for supply organization
- Lighting: adjustable architect’s desk lamp with warm LED bulb
- Materials: raw linen drop cloths, weathered wood surfaces, galvanized metal bins, kraft paper rolls
This is where the magic actually happens, not the finished mantel—there’s something deeply satisfying about a well-stocked creative corner that feels like your own little workshop.
Pumpkin Projects That Don’t Involve Carving
Real talk: carved pumpkins rot and smell terrible. These alternatives last all season and look better too.
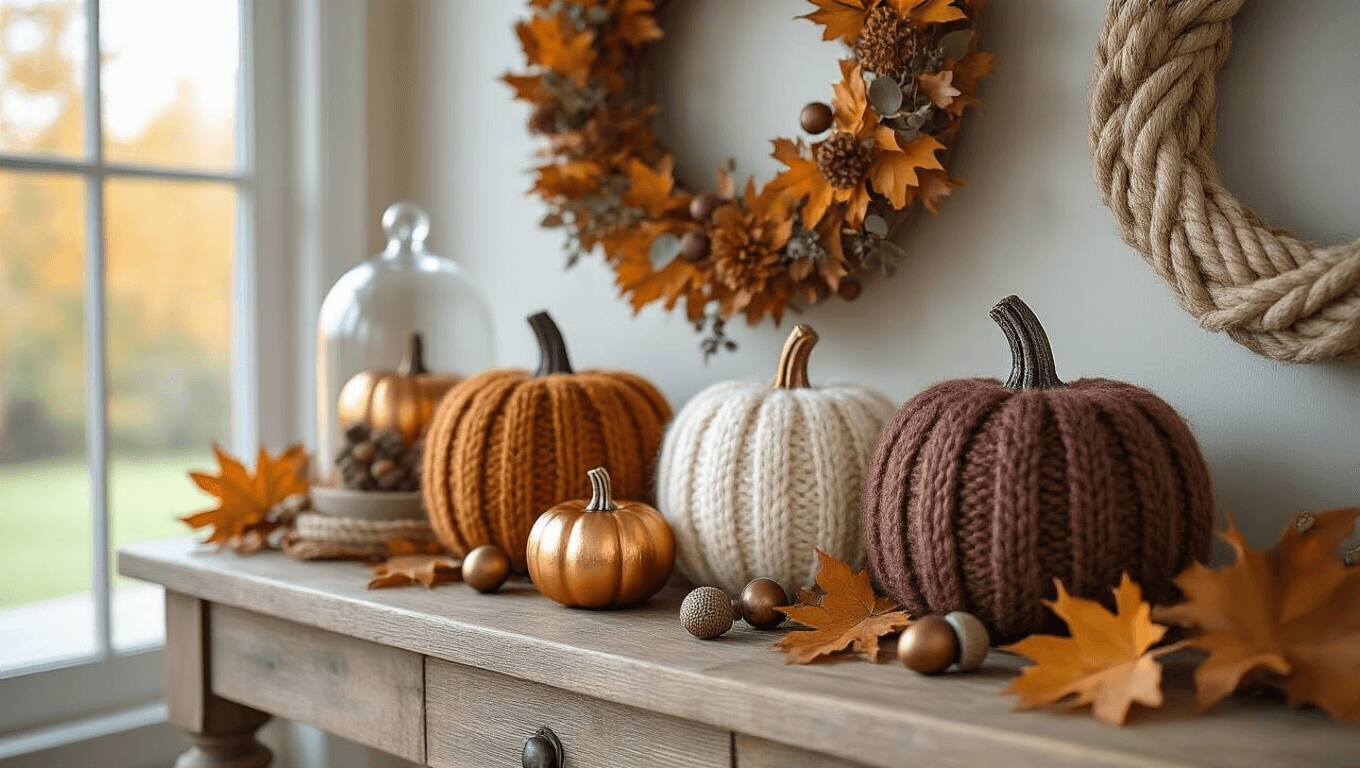
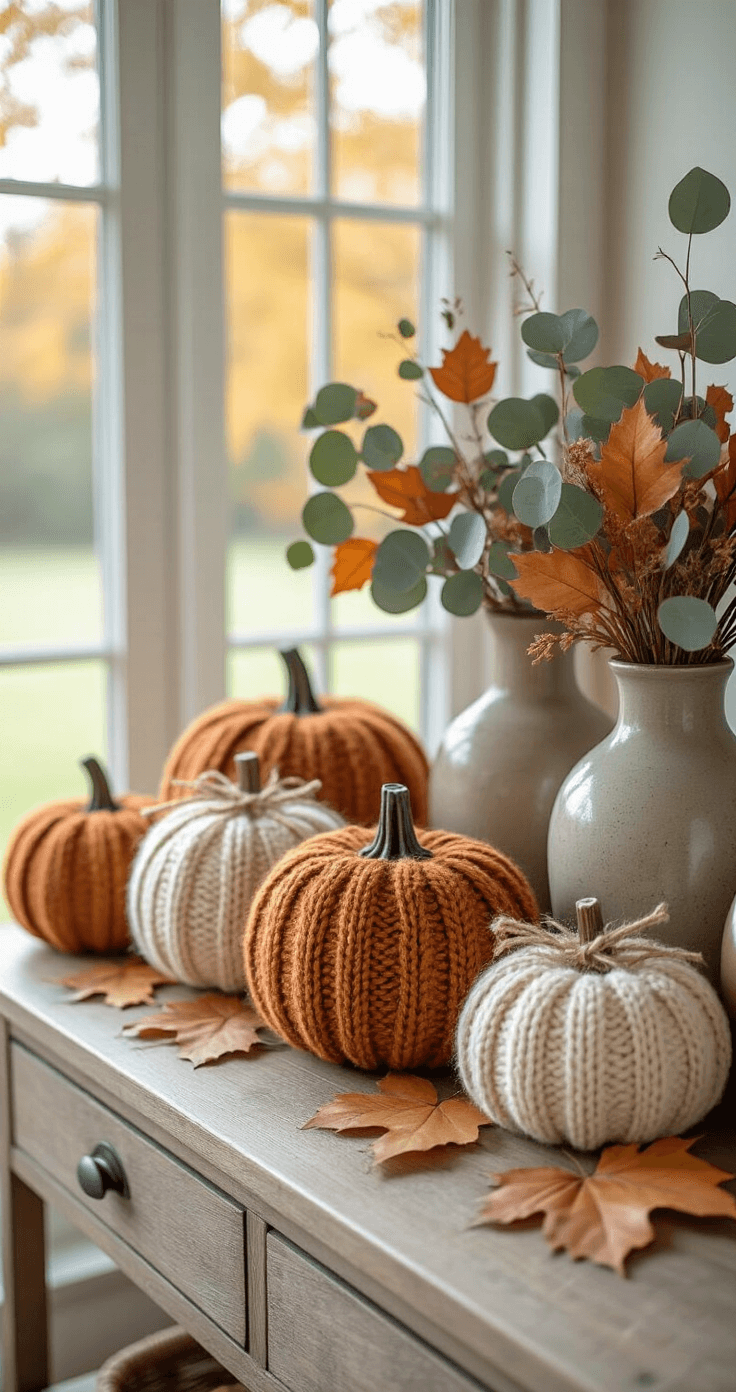
Sweater Pumpkins (My Personal Favorite)
I stumbled onto this technique by accident when I thrifted an ugly orange sweater. Now I make a dozen every year.
What you need:
- Old sweaters or fabric scraps
- Polyfill stuffing
- Twine
- Cinnamon sticks or small branches
- Rubber bands
How to make them:
Cut a rectangular piece from the sweater body. Turn it inside out and sew or hot glue one short end closed. Flip it right-side out and stuff with polyfill until pleasantly plump. Gather the top and secure with a rubber band. Wrap twine around the middle from bottom to top, creating pumpkin ridges. Cover the rubber band with more twine and stick a cinnamon stick in the center as a stem.
These take about 20 minutes once you get the hang of it. I make them in different sizes and group them on my mantel.
Painted Pumpkins for People Who Can’t Draw
You don’t need artistic talent for this. Stencils are your friend.
Three foolproof designs:
- Polka dots: Use a pencil eraser or bottle cap dipped in paint
- Ombré: Start with dark paint at the bottom and gradually add white as you go up
- Metallic: Spray paint the whole thing gold or copper and call it modern
I learned the hard way to use foam pumpkins instead of real ones for painted designs. Real pumpkins have bumpy skin that makes painting annoying.
Pressed Flower Pumpkins (Fancy But Easy)
This technique looks like it took hours but actually takes twenty minutes.
Collect small fall flowers and leaves. Press them in a heavy book for a few days. Arrange them on a white or cream pumpkin. Brush Mod Podge over them to seal.
The result looks gallery-worthy. Guests always ask where I bought them.
🖼 Steal This Look
- Paint Color: Behr Pumpkin Spice M220-7
- Furniture: distressed farmhouse console table with open shelving
- Lighting: vintage Edison bulb pendant with brass finish
- Materials: chunky cable knit textures, raw cotton stems, weathered wood, jute twine
I keep a bin of thrifted sweaters in my craft room specifically for September, and there’s something deeply satisfying about transforming that regrettable holiday gift into a centerpiece that gets compliments every Thanksgiving.
Wreaths That Won’t Fall Apart in a Week
I’ve made wreaths that literally fell to pieces on my front door. These methods actually hold up.
The Braided Rope Wreath
This is ridiculously simple and looks coastal-meets-farmhouse.
Get thick rope from the hardware store. Braid three sections together. Form into a circle and hot glue the ends. Attach a fabric bow and some eucalyptus sprigs.
Done. It costs maybe $8 and looks expensive.
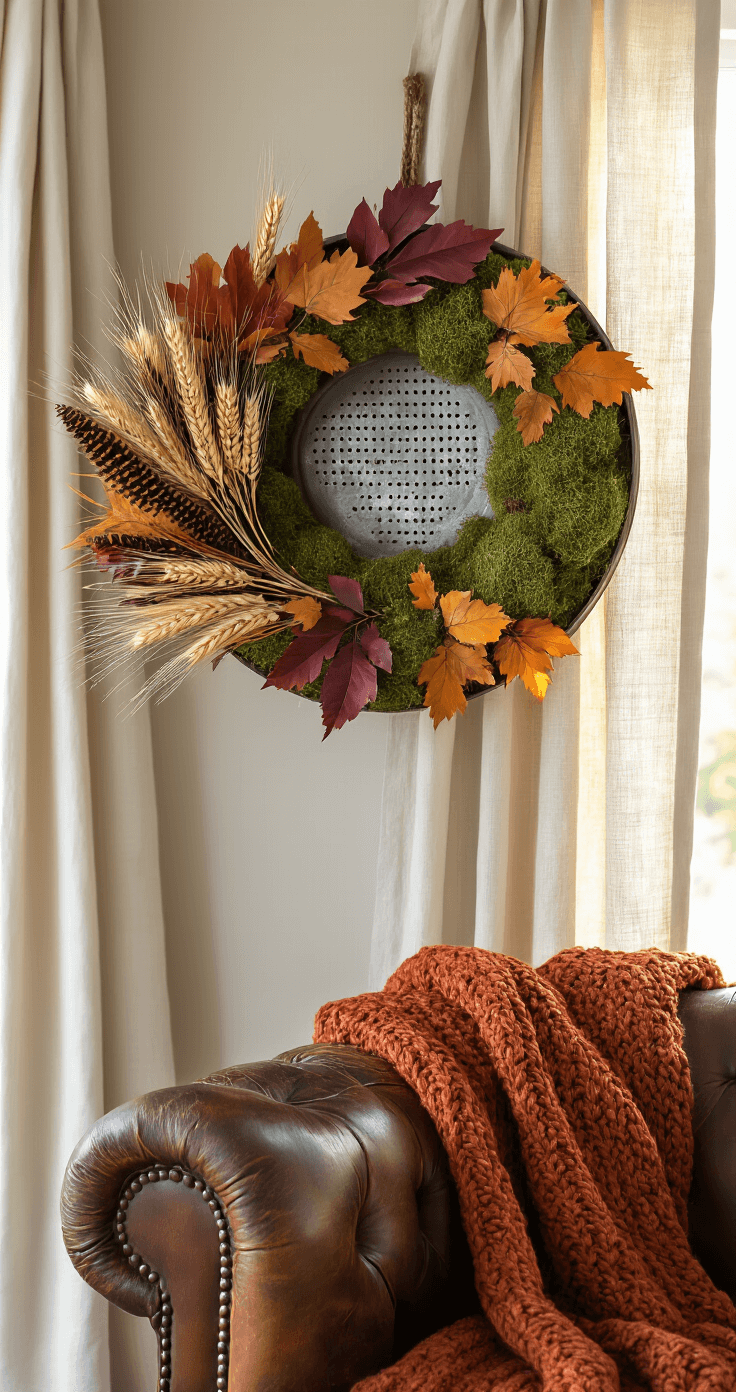
The Grain Sifter Wreath (Vintage Charm)
You need an old grain sifter for this one. Check thrift stores or your grandmother’s attic.
Fill the sifter with preserved moss as a base. Hot glue fall leaves, feathers, and dried wheat around the edges. Add a ribbon hanger.
This style works especially well on farmhouse doors or above mantels.
Quick Garlands for Instant Atmosphere
Garlands transform spaces faster than any other decor.
My go-to waxed leaf garland:
- Collect beautiful fall leaves.
- Melt beeswax or paraffin wax in a double boiler.
- Dip each leaf to coat both sides.
- Let dry on wax paper.
- String them together with fishing line or twine.
The wax preserves the leaves and gives them a gorgeous sheen. This garland lasts for years if you store it carefully.
🏠 Steal This Look
- Paint Color: use Valspar brand. Match the ACTUAL wall color in the image. Format: Valspar ColorName CODE
- Furniture: vintage grain sifter, weathered wooden mantel shelf, farmhouse entry console table
- Lighting: oversized black iron lantern pendant for entryway
- Materials: natural jute rope, preserved reindeer moss, dried wheat stalks, burlap ribbon, faux eucalyptus, galvanized metal accents
This is the wreath section that finally stopped my annual October ritual of sweeping fallen leaves off my porch—now I actually enjoy opening my door instead of apologizing for it.
Centerpieces That Actually Fit on Your Table
I’m convinced most people have never actually tried to eat dinner around their centerpieces. Make arrangements that leave room for plates.
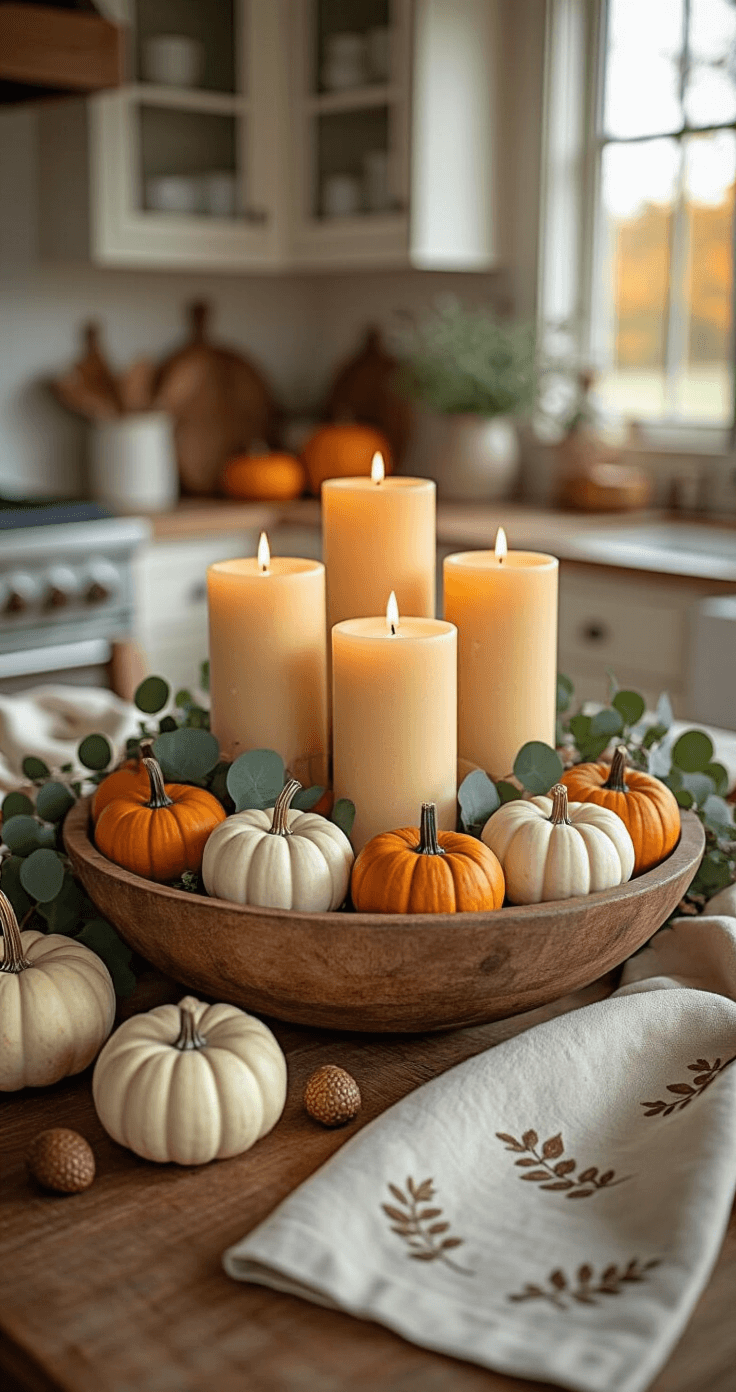
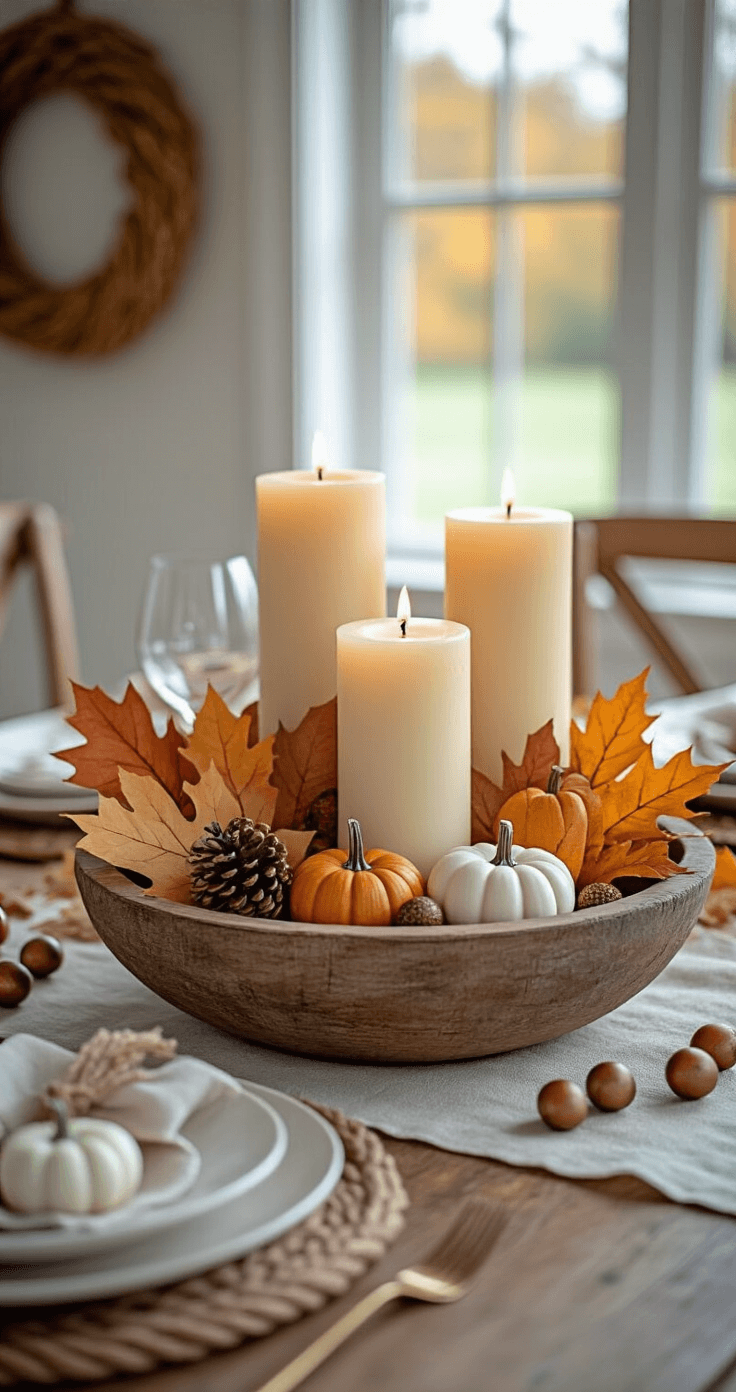
The Wooden Dough Bowl Display
These long, shallow bowls create elegant centerpieces without hogging space.
Line the bowl with three pillar candles down the center. Surround with mini pumpkins,
This post may contain affiliate links. Please see my disclosure policy for details.