Christmas Shelf Decor That’ll Make Your Heart (and Your Shelves) Sing
Contents
Christmas shelf decor transformed my boring bookcase into the coziest spot in my entire house last December, and I’m about to show you exactly how to do the same.
Listen, I get it. You’re staring at those shelves right now, wondering how on earth people make theirs look like a Hallmark movie set while yours resembles a chaotic yard sale. You’ve got random books, dust bunnies, and maybe a sad little candle that’s been there since 2019.
I was there too.
Then I cracked the code, and now my shelves are the first thing people photograph when they visit during the holidays. No joke.
Why Your Shelves Deserve Better This Christmas
Your shelves are prime real estate, friend. They’re at eye level. They’re in your living room, kitchen, or entryway where everyone actually spends time. They’re begging for some holiday magic.
Here’s what makes shelf styling absolutely brilliant:
- It takes 30-90 minutes, not an entire weekend
- You can start with stuff you already own
- Renters can go wild without damaging walls
- The impact-to-effort ratio is chef’s kiss
- You can spend $30 or $300—both work beautifully
I spent about $45 my first year using thrifted pieces, Christmas ornaments, and greenery I clipped from my neighbor’s pine tree (with permission, obviously).
What This Actually Takes (Spoiler: Not Much)
Time commitment: 30-90 minutes per shelf
Money: $30 for the budget-conscious to $300+ if you’re feeling fancy
Skill level: If you can stack books, you can do this
Where it works: Literally any shelf—floating, built-in, kitchen, office, that weird nook in your hallway
The beauty? This works whether your vibe is traditional Christmas explosion, cozy farmhouse, Scandi minimal, or vintage grandma-chic.
I’ve done all of them. My style changes like the weather, and that’s perfectly fine.
The Non-Negotiables: What You Actually Need
Your Hero Pieces (The Show-Stoppers)
Every shelf needs one main character. This is the piece that makes people stop mid-scroll.
Pick one per shelf:
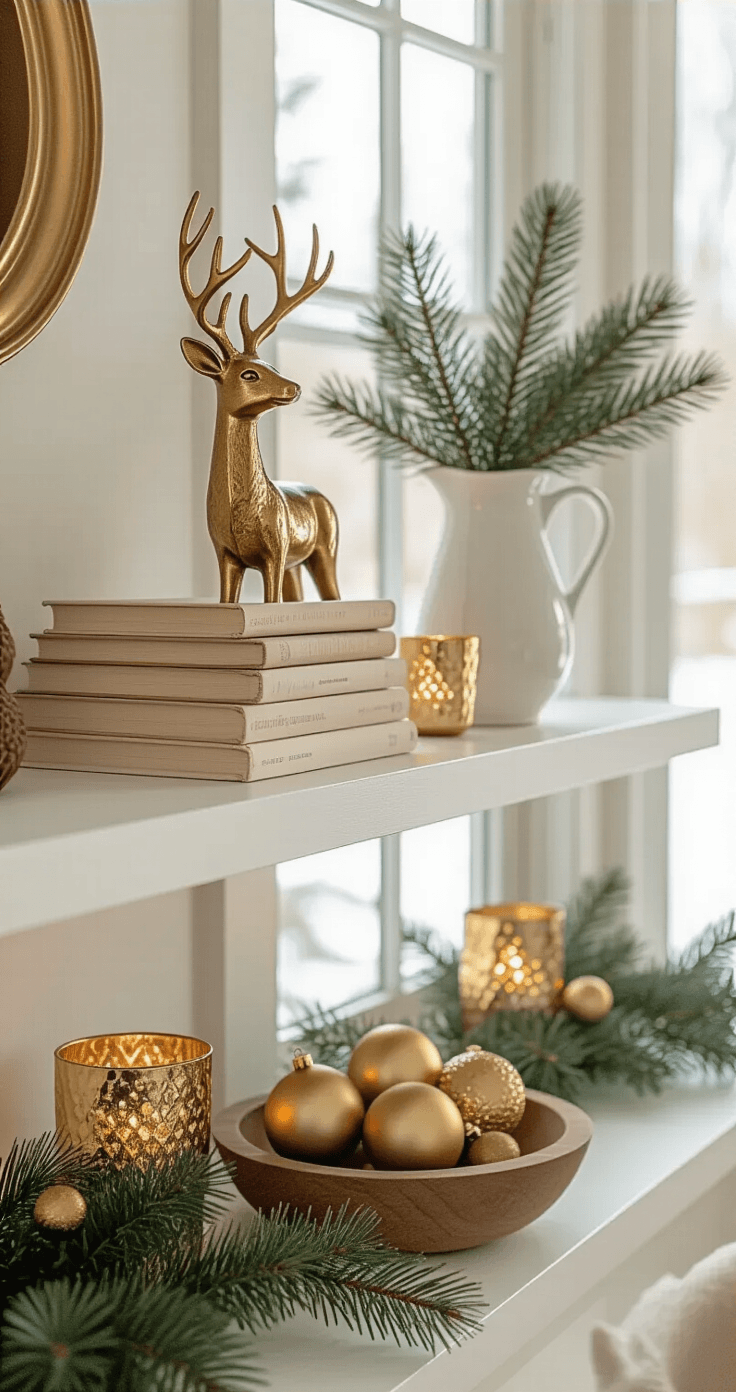
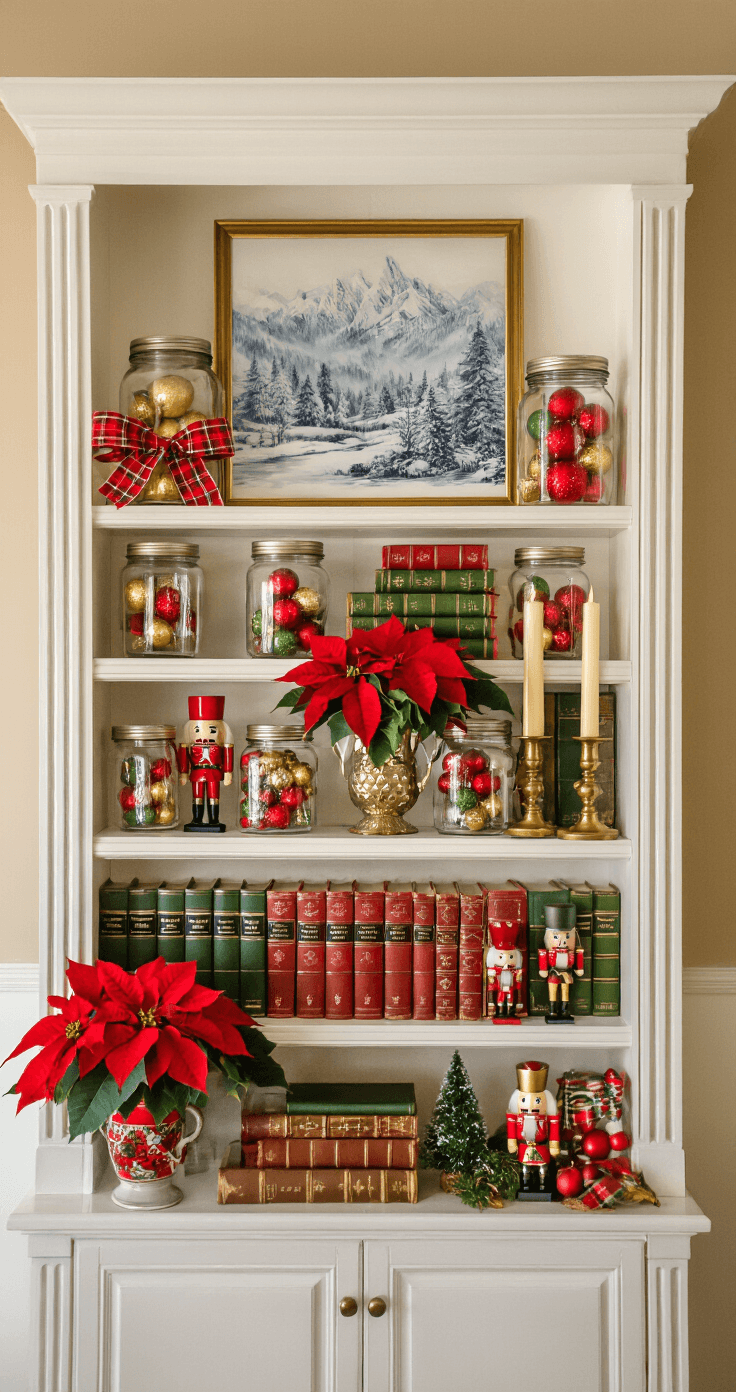
- Framed winter artwork or Christmas prints
- A gorgeous ceramic tree or reindeer sculpture
- An oversized wreath leaning casually behind everything
- That vintage piece your grandmother gave you that actually sparks joy
I found a brass reindeer at a thrift store for $8 last year. It’s now the star of my entire living room shelf display. People ask about it constantly.
Your Supporting Cast
These pieces make your hero look even better:
Books: Stack them spine-out in your color palette. I use cream, forest green, and burgundy spines during Christmas. Books add instant height and sophistication.
Vessels: This is fancy-speak for containers.
- Pitchers filled with faux pine branches
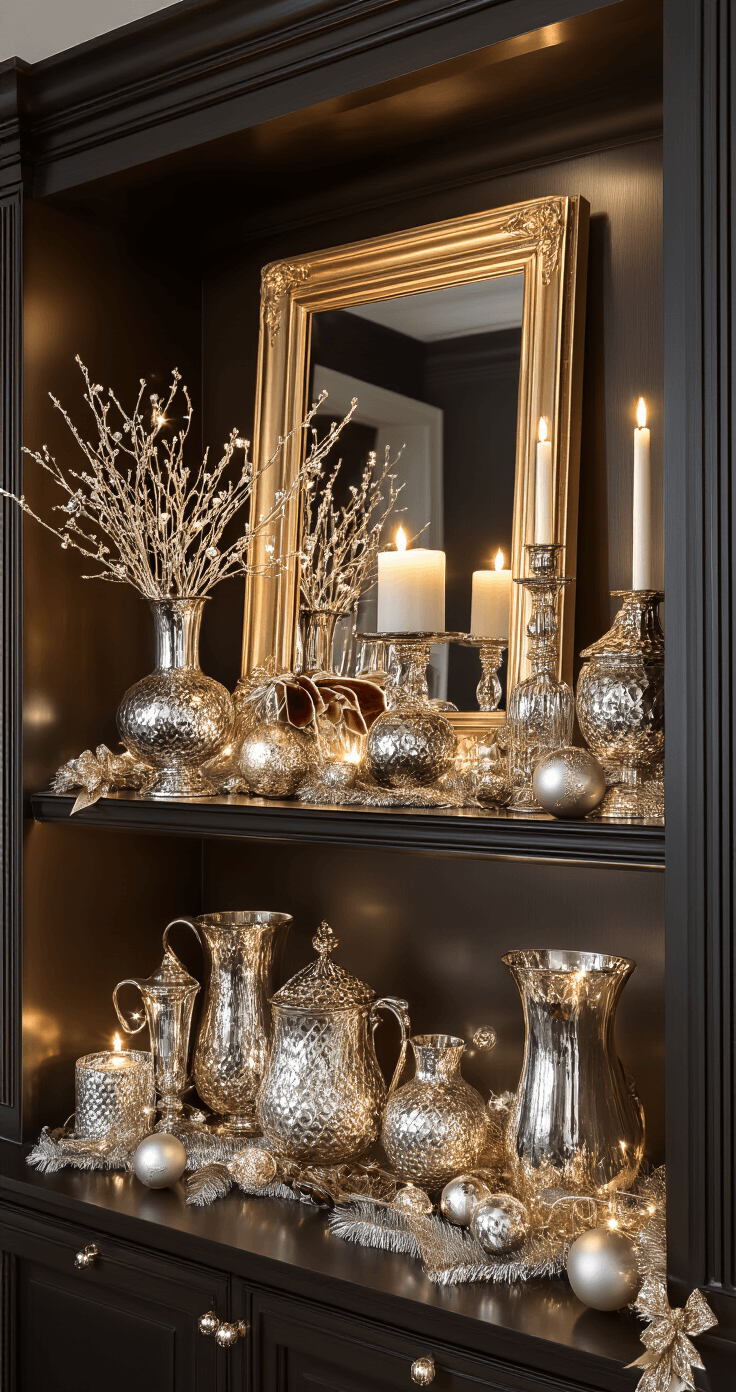
- Glass hurricanes stuffed with ornaments
- Wooden bowls holding pinecones
- Vintage lanterns with battery candles inside
The magic formula: Hero piece + books + two vessels = instant vignette.

The Details That Make You Look Professional
This is where you sprinkle in the good stuff:
- Ornaments used as filler (brilliant and cheap)
- Garland draped along the shelf edge
- Gold or brass bells clustered together
- Ribbon tied around absolutely everything
- Mini wreaths hooked on pitcher handles
I bought a box of 50 gold ornaments for $12 and scattered them everywhere. Bowls, jars, piled around candles. High impact, low cost.
The Extras That’ll Make You Swoon
You don’t need these, but they’re delightful:
Mini trees: Get small Christmas trees in varying heights. Three is the magic number. Flocked, wooden, fabric—whatever speaks to you.
Fresh greenery: Real pine branches smell incredible and photograph like a dream. I cut a few stems from our Christmas tree base and stick them in vintage milk bottles.
Metallic magic: Brass candlesticks with ivory tapers add instant elegance. Mercury glass catches the light beautifully. A little sparkle goes a long way.
Natural elements:
- Dried orange slices
- Cinnamon sticks bundled with twine
- Pinecones (free from outside!)
- Branches in a simple vase
The smell of fresh greenery mixed with cinnamon sticks? That’s the scent of Christmas right there.
How to Actually Style This Thing (The Step-by-Step)
Before You Touch Anything
Clear everything off. I mean everything. Dust like your mother-in-law is visiting. She’s not, but you’ll feel better.
Pick your vibe:
- Traditional: red, green, gold, all the classic Christmas energy
- Neutral: whites, creams, natural wood, soft greens
- Metallic glam: gold, silver, mercury glass, sparkle everywhere
- Farmhouse: galvanized metal, plaid, rustic wood, vintage finds
I change mine up every year because I have commitment issues with design styles.
Gather your army: Round up everything you might use before you start. Trying to hunt down ornaments mid-styling kills the creative flow.
Building Your Display (The Fun Part)
Step 1: Start at the back
Place your largest items first.
This post may contain affiliate links. Please see my disclosure policy for details.