Red Bow Christmas Tree: A Timeless Holiday Decor Statement
Contents
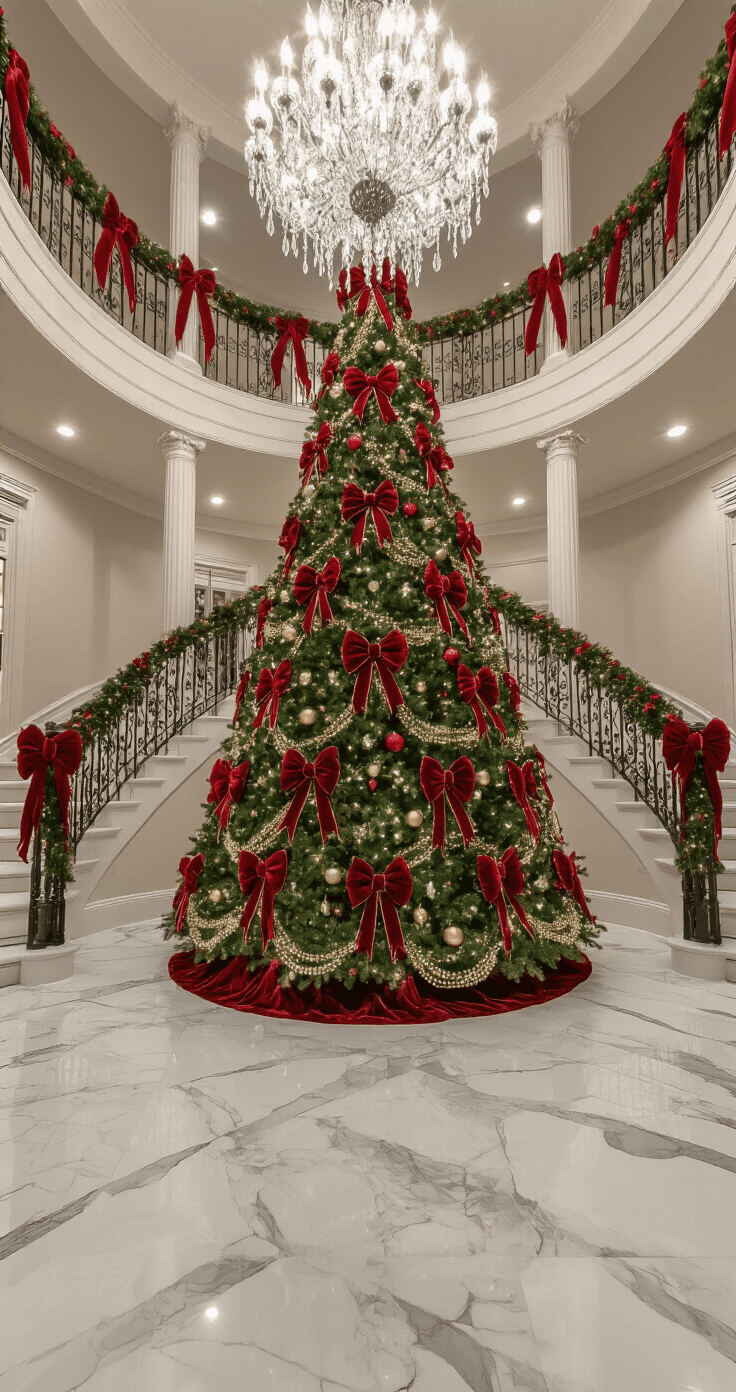
Picture this: A Christmas tree adorned with lush, vibrant red bows that instantly transform your space into a festive wonderland. I’m about to show you how to create the most stunning red bow Christmas tree that’ll make your home feel like a holiday magazine spread.

Why Red Bows? The Magic of Simple Elegance
Let’s be real – holiday decorating can be overwhelming. But red bows? They’re the secret weapon of effortless Christmas styling.
What Makes Red Bows So Special:
- Instantly adds drama and sophistication
- Works with nearly every decor style
- Budget-friendly transformation
- Takes minimal time to execute
🎨 Steal This Look
- Paint Color: Sherwin-Williams Snowbound SW 7004
- Furniture: velvet Chesterfield sofa in forest green or deep navy, paired with a reclaimed wood coffee table with turned legs
- Lighting: oversized brass and glass lantern pendant or vintage-inspired candelabra floor lamp with dimmable Edison bulbs
- Materials: plush velvet ribbon with wired edges, matte ceramic tree bases, aged brass ornament hooks, fresh Fraser fir or Norway spruce garland, chunky knit wool throws
There’s something deeply nostalgic about a red bow tree—it reminds me of my grandmother’s living room where the tree felt like a gift itself, wrapped and waiting, and that’s the feeling I want every guest to walk into.
Your Quick Styling Toolkit
Before we dive in, here’s what you’ll need:
Essential Supplies
- Red velvet ribbon
- Sharp scissors
- Wire-edged ribbon
- Tree light strands
- Ornament hooks
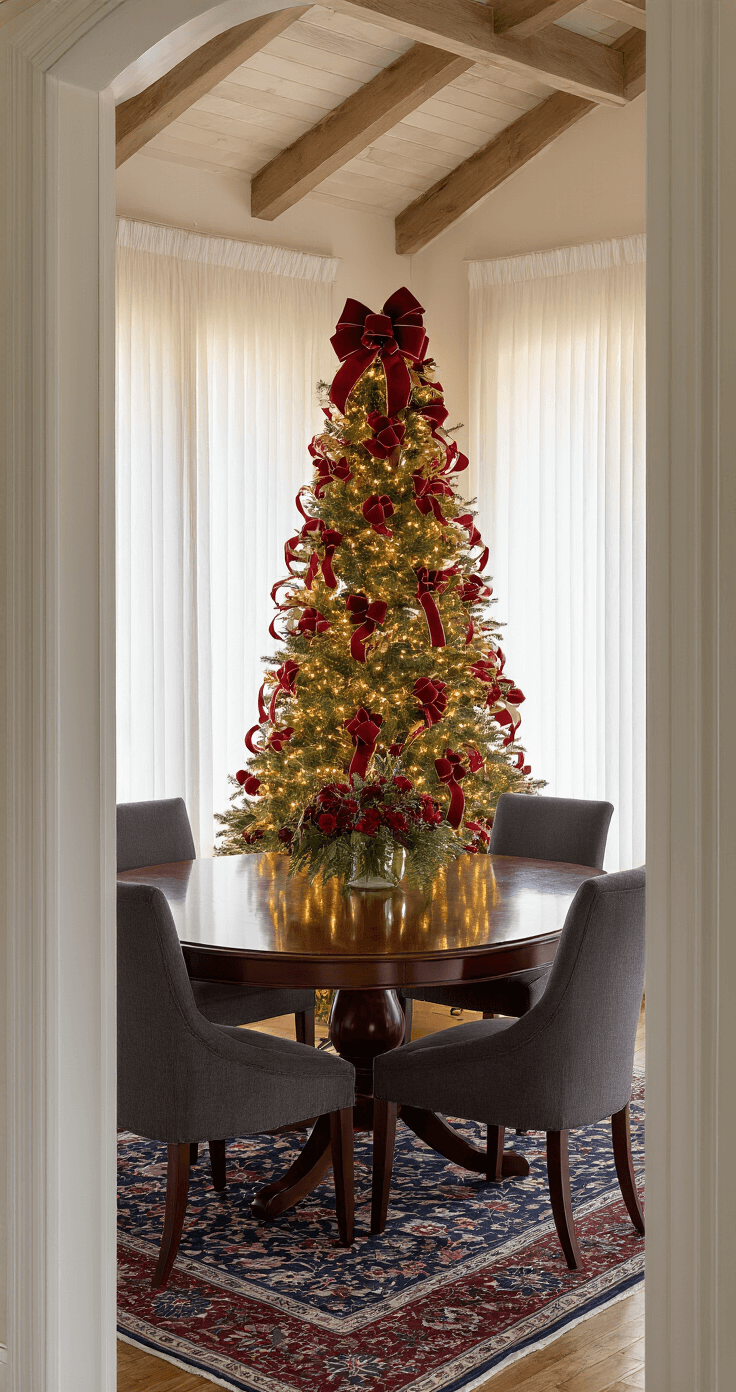
🌟 Steal This Look
- Paint Color: Benjamin Moore Simply White OC-117
- Furniture: slipcovered linen sofa in natural ivory, weathered oak coffee table with turned legs
- Lighting: antique brass adjustable floor lamp with linen drum shade
- Materials: raw Belgian linen, aged brass, reclaimed wood, matte ceramic, red velvet
This is the room where you’ll actually sit with cocoa and stare at the tree, so every choice should feel like a warm exhale after a long December day.
✓ Get The Look
Pro Styling Secrets
Bow Placement Strategy
- Start with your statement bow at the top
- Create a cascading effect down the tree
- Use varying bow sizes for visual interest
- Mix textures – velvet, satin, glitter
Pro Tip: Odd numbers create the most natural, balanced look. Aim for 3-5 large bows with smaller accent bows filling gaps.

DIY Bow-Making Cheat Sheet
Quick Bow Technique
- Cut 2-3 feet of ribbon
- Create a large loop
- Pinch center
- Twist wire or zip tie in middle
- Fluff and shape
- Attach to tree branch
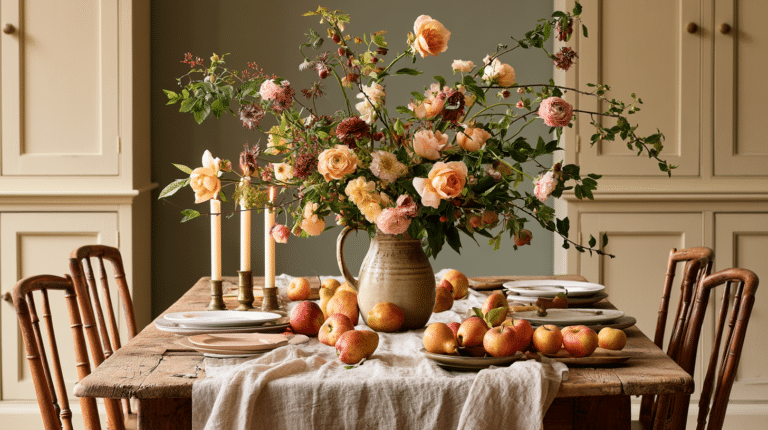
★ Steal This Look
- Paint Color: Farrow & Ball Pointing 2003
- Furniture: antique pine farmhouse dining table with turned legs, paired with Windsor-style spindle back chairs
- Lighting: aged brass chandelier with candle-style bulbs and crystal droplets
- Materials: raw linen table runners, hand-thrown ceramic serving pieces, reclaimed wood cutting boards, hammered copper accents
There’s something deeply satisfying about stepping back from your tree with a glass of wine in hand, watching how the bow placement transforms as evening light shifts across the dining room—this is the room where holiday memories actually happen.
🛒 Get The Look
Complementary Color Combos
Red bows play beautifully with:
- Gold accents
- White ornaments
- Silver baubles
- Metallic picks
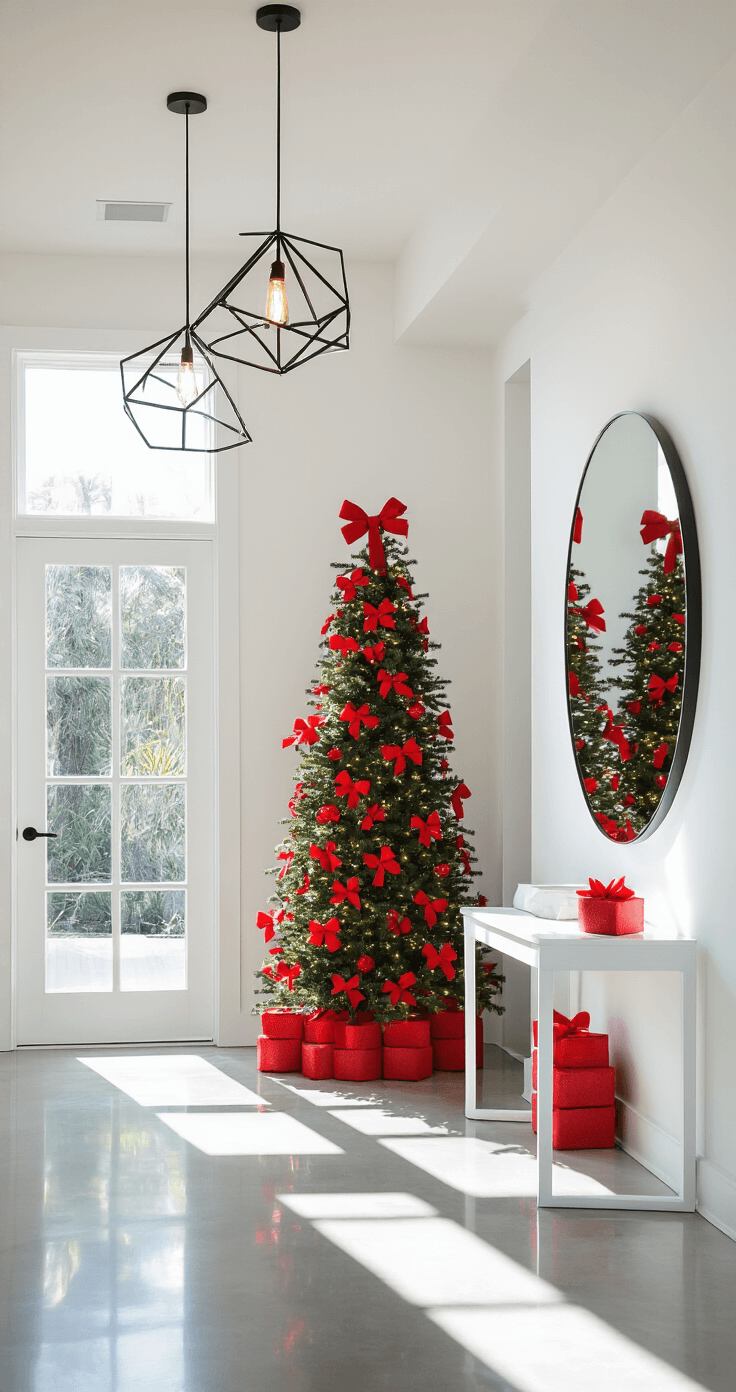
🌟 Steal This Look
- Paint Color: use Behr brand. Match the ACTUAL wall color in the image. Format: Behr Swiss Coffee 12
- Furniture: cream-colored velvet sofa with rolled arms, antique brass coffee table with marble top, built-in white painted bookshelves with crown molding
- Lighting: crystal chandelier with warm brass finish, picture lights above shelving
- Materials: plush velvet, polished brass, Carrara marble, lacquered wood, mercury glass
There’s something deeply satisfying about walking into a living room where the Christmas tree feels like it grew there organically—the red bows against cream walls with that soft brass glow is the kind of combination that makes guests linger by the fire.
Budget-Friendly Hacks
- Reuse last year’s bows
- Shop post-holiday sales
- Mix handmade with store-bought bows
- Spray paint existing bows for a refresh
Common Mistakes to Avoid
❌ Don’t:
- Overcrowd your tree
- Use bows that are too small
- Forget to step back and assess overall look
✅ Do:
- Create visual balance
- Use high-quality ribbon
- Experiment with placement

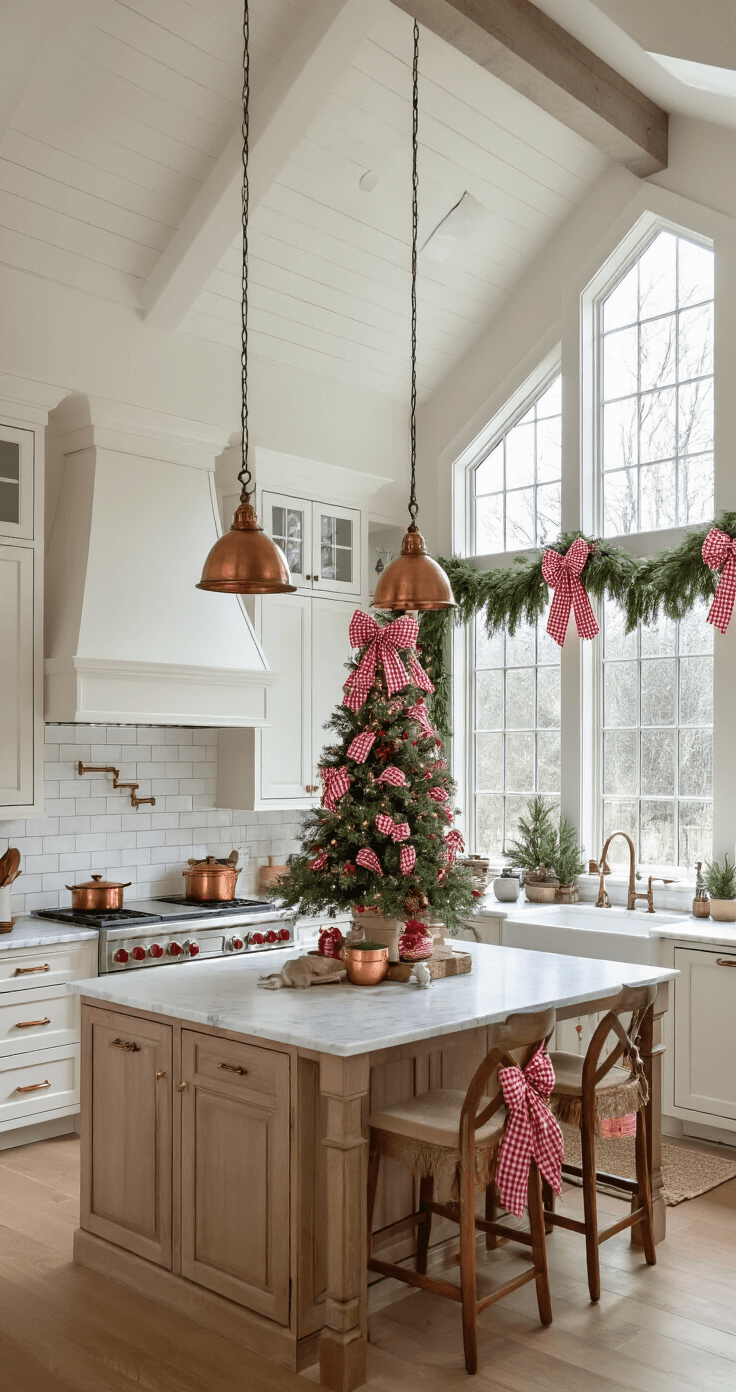
🖼 Steal This Look
- Paint Color: PPG White Flour PPG14-15
- Furniture: slipcovered linen sofa in natural ivory, weathered oak coffee table with turned legs
- Lighting: oversized aged brass chandelier with candle-style bulbs
- Materials: matte velvet ribbon, wired linen-edged bows, fresh cedar garlands, antiqued mercury glass ornaments
There’s something deeply satisfying about a tree that feels collected rather than decorated, where each red bow catches the light just so and the whole room exhales into the holiday season.
The Final Touch: Styling Like a Pro
Tree Topper Technique
Your top bow should be 1.5-2 times larger than side bows. Make it dramatic, make it bold!
💡 Steal This Look
- Paint Color: Dunn-Edwards Whisper DEW340
- Furniture: tufted ivory velvet settee with turned wooden legs
- Lighting: crystal candelabra floor lamp with dimmer switch
- Materials: matte velvet ribbon, antique mercury glass, hand-blown glass ornaments, aged brass accents
This is the moment where your tree transforms from decorated to designed—that oversized bow crowning your work is your signature, the exclamation point on weeks of holiday anticipation.
Maintenance and Storage
- Store bows flat in tissue paper
- Keep away from direct sunlight
- Fluff before next use
Your Turn!
Ready to transform your Christmas tree? Remember, there’s no “perfect” way – just your way. Embrace the process, have fun, and create a tree that makes you smile.
Bonus Tip: Take plenty of photos. Your red bow masterpiece deserves to be shared!
Quick Shopping Guide:
💡 Steal This Look
- Paint Color: use Fine Paints of Europe brand. Match the ACTUAL wall color in the image. Format: Fine Paints of Europe ColorName CODE
- Furniture: specific furniture for this room
- Lighting: specific lighting fixture
- Materials: key textures and materials
This is the moment where your tree stops being Pinterest-perfect and starts being yours—those slightly crooked bows and hand-tied knots are what make guests lean in and ask where you got your ideas.
This post may contain affiliate links. Please see my disclosure policy for details.